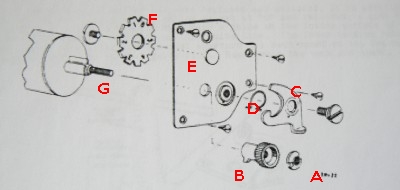
a.
The tension dog
spring D may be replaced without removal of the plate.
b.
If the entire
plate is to be removed, use the special tension lock nut wrench and pliers to
remove the tension snail lock nut A The tension snail
B may now be
removed from the tension roller-shaft- it may be necessary to wind the tension to
“6”before the tension snail can be unscrewed. At this point the four #1 x
1./4 “oval head screws are removed and the plate lifted from the
camera body.

A pair of tweezers can be used as the Tension Lock Nut Wrench.
If the tension snail lock nut can not be turned. I'm afraid you'll have to make a pipe with two fitting notches.
c.
Lubricate
the case and plate before bearing points of the tension roller shaft with
graphic grease; and, lubricate the internal tension spring with a few drops of
light oil inserted through the left end (see page 3)
d.
Reassemble the
tension setting plate over the threaded end of the shaft and lock the tension
setting clamp to the shaft. Check side play of the roller and if more than
1/64”use spacer washer at the case bearing end of the shaft. Wind the
spring several turns and then turn the curtain out by hand several times to
remove curtain slack. Slowly release the tension- do not allow the tension
setting clamp to spin free. Lift the tension plate; set the indicator gear so
that “1”appears in the indicator hole; turn the one tooth of the pinion
clockwise from the vertical about 30 degrees and now engage the counter gear and
the one tooth pinion. If it is not possible to wind the tension “
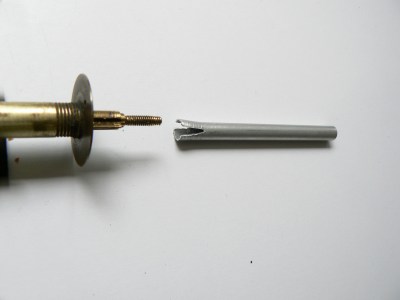
Home
made Tension Setting Clamp
e.
With the
tension setting clamp, wind the tension to “